Overview
The plugin is a Javascript library that retailers can integrate into their e-commerce platform to enable customers to personalise a product, with text, photos, colours, etc, and see a preview of what the product will look like.
The plugin can be themed to match the look of the retailers website and is multi-lingual capable.
When the plugin is initialised it will load all fields for the customer to personalise a product. Once they have entered text and chosen options, the user should click the preview button to view what the product will look like. At this point a unique session identifier (GUID) is assigned and should be saved with the basket item when the customer adds the item to the basket.
If the customer is not redirected to the cart page then the plugin should be reset to clear fields and the assigned guid.
When the customer finishes checking out, the e-commerce backend should call the Order API to submit the order, including a guid per item.
Setup
There are three links required for the plugin to function:
<script src="https://cdn.custombrandco.com/plugin/1.0/languages/en-GB.js"></script>The first sets the language of the plugin. Current available languages are en-GB (British), fr-FR (French), sv-SE (Swedish). We can add other languages on request or you can create your own by just copying one of these files and replacing the text and referencing that file instead.
<link href="https://cdn.custombrandco.com/plugin/1.0/cbc.min.css" rel="stylesheet" />
The second link references the styling. You will probably want to change the colours and styling so you can download an un-minified version here:
https://cdn.custombrandco.com/plugin/1.0/cbc.css and reference your own version instead.
<script src="https://cdn.custombrandco.com/plugin/1.0/cbc.min.js"></script>The final link references the JavaScript library.

This area is the input form. This is required on the page and should be as below.
<div cbc-part="personaliseForm"></>
The preview button will automatically be added to the bottom of the form unless you add the button yourself on the page like this:
<button cbc-part="previewBtn"></button>To load the form the plugin needs to be initialized using jQuery. This can be on page load, as this example is doing, or after a click of a button. To initialize the plugin, first get a jQuery reference of the form like this:
var form = jQueryE('div[cbc-part="personaliseForm"]');Next you can check to see if the plugin is already loaded by checking for the existence of the first child that is created by the plugin:
var child = form.children("#Cbc-Wrapper").first();
if (child.length != 0) return;
Then you can initialize the plugin on the form div:
form.CustomBrand({
    Language: 'en-GB',
    AuthCode: 'EMG45853',
    ProductCode: '1271-106296',
    onLoaded: function() {
    },
    onPreviewUrlsReceived: function(data) {
    },
    onVariableChanged: function(){
    },
});
There are 3 required parameters.
- The language entered determines the language for field names and sets the appropriate profanity filter. The name is a combination of an ISO 639 two-letter lowercase culture code associated with a language and an ISO 3166 two-letter uppercase subculture code associated with a country or region.
- The AuthCode will be supplied by Custom Brand Co when the retailer account is setup.
- Product code is the SKU of the product.
There are 3 events that can be hooked into.
- onLoaded: Fires when the product data is received and the form is built.
- onVariableChanged: Fires when text or image selection has been changed in the form. It is a good idea to block 'add to cart' at this point until a preview is done.
- onPreviewUrlsReceived: Fires when the user has pressed the preview button and the data returned. The data returned is an array of strings, the first is the unique identifier (guid) of the personalisation session and the remaining are a list of URLs for the preview image(s).
Preview Image(s)
There are currently two choices to display preview images. You can place an control on the page like so:
<div class="imageholder" cbc-part="personaliseImages" cbc-style="gallery"></div>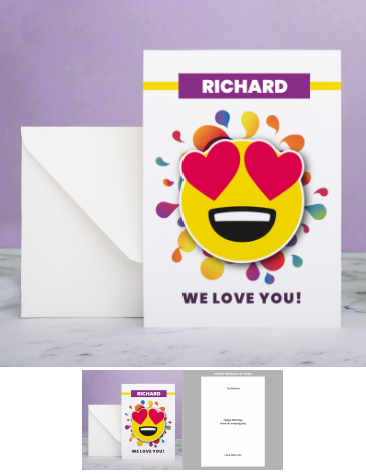
You can set the cbc-style attribute to 'gallery', as shown here, or 'list' which will output the image(s) with no styling.
The other option is to not include the image control div and use the onPreviewUrlsReceived
event to get URLs and then write your own code to place the images however you want.
onPreviewUrlsReceived: function (data){
    jQueryE('#cbc-guid').text(form.CustomBrand('getGuid'));
    jQueryE('#resultDiv').show();
    var div = jQueryE('#cbc-urls');
    div.empty();
    jQueryE.each(data, function (index, url) {
        div.append('<div style="word-wrap: break-word; margin-top:20px;">' + url + '</div>');
    });
}
Adding to Basket
The plugin generates a unique identifier (GUID) then identifies the personalisation session. To submit an order, the GUID for each item should be provided to ensure the correct personalisation is applied to the final product.
If you use the onPreviewUrlsReceived event, you can retrieve the GUID when a preview is requested.
Alternatively you can get the GUID from the form any time by using the following:
var form = jQueryE('div[cbc-part="personaliseForm"]');
form.CustomBrand('getGuid');
After the user has added to the basket, if they have not been redirected to another page, you will want to reset the form to ensure that the user starts a new personalisation session. Otherwise the changes they make might affect the last session. You can reset the plugin with:
var form = jQueryE('div[cbc-part="personaliseForm"]');
form.CustomBrand('reset');
This will clear the form and remove the GUID
Example
Using the onPreviewUrlsReceived event I have listed the GUID and Preview URLs below:
Full Code
<script src="https://cdn.custombrandco.com/plugin/1.0/languages/en-GB.js"></script>
<script src="https://cdn.custombrandco.com/plugin/1.0/cbc.min.js"></script>
<link href="https://cdn.custombrandco.com/plugin/1.0/cbc.min.css" rel="stylesheet" />

<select onchange="productChanged(this)" >
    <option>Pick a product</option>
    <option value="0001-000001">Cadbury Dairy Milk</option>
</select>
<div cbc-part="personaliseForm">
</div>
<div cbc-part="personaliseImages" cbc-style="gallery">
</div>

<script type="text/javascript">
function productChanged(select) {
    var value = jQueryE(select).val();
    var form = jQueryE('div[cbc-part="personaliseForm"]');
    if (!form) return;
    var child = form.children("#Cbc-Wrapper").first();
    if (child.length !== 0) {
        child.empty();
    }
    if (value === 'Pick a product') return;
    personalise(value, form);
};

function personalise(productCode, form) {
    form.CustomBrand({
        Language: 'en-GB',
        AuthCode: '/hyswXyqSBDIyXVnH3WK9mg7BfcocK69ULiUwfrAWCw=',
        ProductCode: productCode,
        onLoaded: function () {
        },
        onPreviewUrlsReceived: function (data) {
            jQueryE('#cbc-guid').text(form.CustomBrand('getGuid'));
            jQueryE('#resultDiv').show();
            var div = jQueryE('#cbc-urls');
            div.empty();
            jQueryE.each(data, function (index, url) {
                div.append('<div style="word-wrap: break-word; margin-top:20px;">' + url + '</div>');
            });
        }
    });
};

function reset() {
    var form = jQueryE('div[cbc-part="personaliseForm"]');
    form.CustomBrand('reset');
};
</script>